
SETTING BUSINESS INFORMATION
Dear valued partners,
Keeping your business information accurate is crucial. It ensures you receive the best possible support from Delivery K and optimizes your delivery process, leading to a better customer experience. When your information is up-to-date, customers can quickly find the products they’re looking for.
As a store owner, you have full control to easily manage all your business details, including:
- Business hours
- Delivery information
- Reservations
- Takeout orders
How to Update Your Store Information on the Delivery K App
Step 1: Access Store Management
- Open the Delivery K app and log in to your “Partner Account.”
- Navigate in My Info > Manage my store
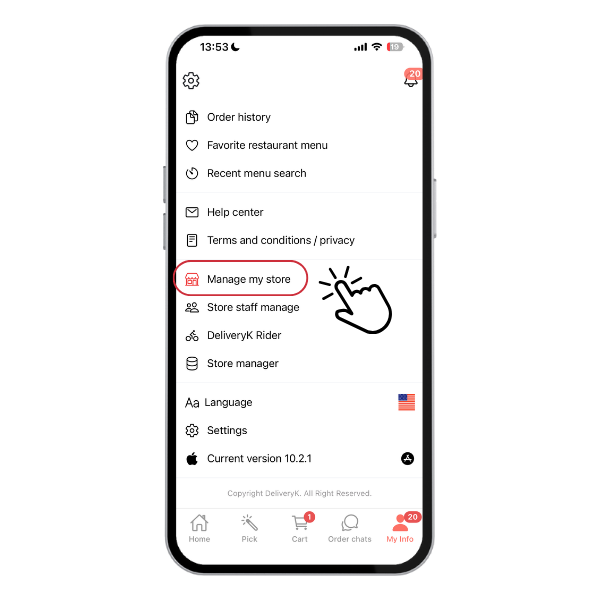
→ Select “Manage My Store.”
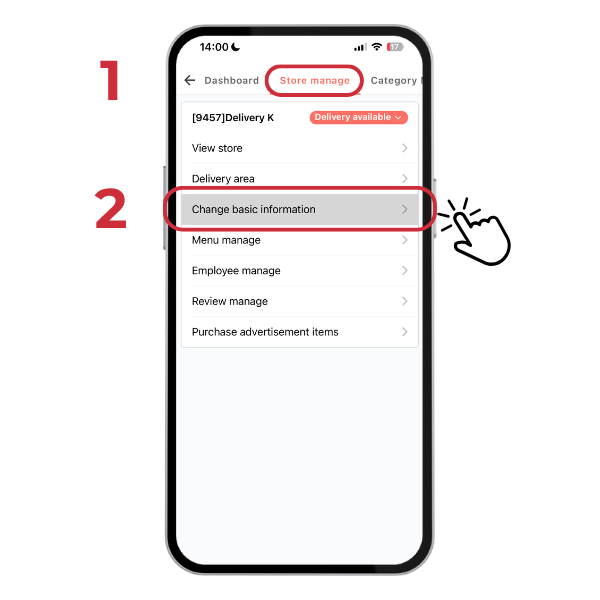
Step 2: Update Basic Store Information
- Go to Store Manage > Change Basic Information to update your store’s details.
Information to Update:
- Basic Tab: Enter your business hours, order reception time, cooking time, and delivery time.
- Delivery Tab: Turn delivery order reception ON/OFF and set the waiting time.
- Reservation Tab: Enable or disable reservations and indicate if a location request is needed.
- Packaging Tab: Turn takeout order reception ON/OFF and enter any packaging coupon discount amounts.
order reception ON/OFF,
waiting time setting
Step 3: Save Changes
- After making all necessary updates, click the “Save” button to apply your changes.
Thank you!
Delivery K

Chia sẻ bài viết: